AKS cluster includes several components and creating one on Azure without a Terraform module makes it time-consuming. In this post, I’ll walk through the steps in provisioning an AKS cluster leveraging the verified module offered by Microsoft Azure.
Prerequisites
- Terraform
- Azure credentials (this is required so Terraform can authenticate and deploy resources to Azure)
- Kubectl
- Azure CLI
Step 1: Creating the AKS Cluster
We will be utilizing the verified AKS module provided by Microsoft. Verified modules are excellent because they receive constant updates and adhere to the best Terraform practices, making them the ideal choice for a production workload.
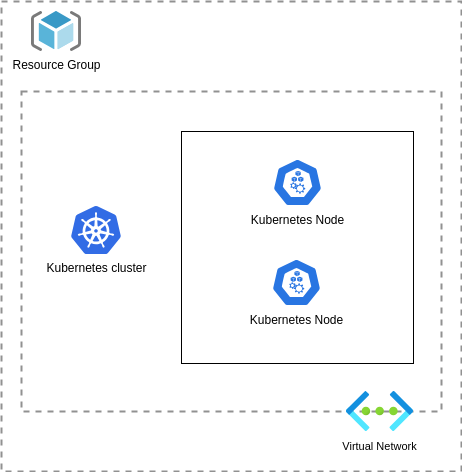
Our Kubernetes cluster will reside within a resource group, where all resources can be organized and monitored. Since Kubernetes heavily depends on networking, we will create a Vnet and a dedicated subnet for deploying our pods.
resource "azurerm_resource_group" "aks" {
  name     = "infinitypp-aks"
  location = "uksouth"
}

resource "random_id" "prefix" {
  byte_length = 8
}

module "aks" {
  source                               = "registry.terraform.io/Azure/aks/azurerm"
  version                              = "7.5.0"
  resource_group_name                  = azurerm_resource_group.aks.name
  vnet_subnet_id                       = azurerm_subnet.pods.id
  public_network_access_enabled        = true
  log_analytics_workspace_enabled      = false
  location                             = azurerm_resource_group.aks.location
  rbac_aad                             = false
  cluster_name                         = "infinitypp"
  cluster_log_analytics_workspace_name = "infinitypp"
  node_pools                           = local.nodes
  sku_tier                             = "Free"
  prefix = "infi-${random_id.prefix.hex}"
  depends_on                           = [
    azurerm_resource_group.aks
  ]
}

locals {
  nodes = {
    for i in range(1) : "worker${i}" => {
      name                  = substr("worker${i}${random_id.prefix.hex}", 0, 8)
      vm_size               = "Standard_D2s_v3"
      node_count            = 1
      vnet_subnet_id        = azurerm_subnet.pods.id
      enable_node_public_ip = true # this is should be turned off
    }
  }
}
Key points:
- We are using a local variable to create a set number of nodes.
- The Nodes are assigned to a dedicated subnet.
- Public network access is enabled; however, it is best practice to disable it unless you need to access your cluster over the public internet.
- The SKU Tier is free. AKS offers two tiers: Free and Standard. The Standard Tier is recommended for running production workloads.
- We are utilizing the depends_on functionality of Terraform to ensure that resource groups are created first.
Step 2: Vnet creation
resource "azurerm_virtual_network" "vnet" {
  address_space       = ["10.52.0.0/16"]
  location            = azurerm_resource_group.aks.location
  name                = "${random_id.prefix.hex}-vn"
  resource_group_name = azurerm_resource_group.aks.name
  depends_on = [
    azurerm_resource_group.aks
  ]
}

resource "azurerm_subnet" "pods" {
  address_prefixes = ["10.52.0.0/24"]
  name = "${random_id.prefix.hex}-sn"
  resource_group_name = azurerm_resource_group.aks.name
  virtual_network_name = azurerm_virtual_network.vnet.name
  enforce_private_link_endpoint_network_policies = true
  depends_on = [
    azurerm_resource_group.aks
  ]
}
Our Vnet is a simple Azure Vnet which consists of a single subnet where the AKS pods will be hosted. You can also utilize the Vnet module to create the networking resources.
The subnet creation can be improved by using Terraform list variable type with a combination of for_each.
Step 3: Configure Terraform Azure provider
Configuring Terraform for authentication with Azure is a key step in deploying resources to the platform. There are multiple ways to authenticate with Azure:
1] Exposing credentials through environment variables
export ARM_SUBSCRIPTION_ID=""
export ARM_TENANT_ID=""
export ARM_CLIENT_ID=""
export ARM_CLIENT_SECRET=""
2] Defining the credentials in the provider block
provider "azurerm" {
  features {}
  subscription_id   = ""
  tenant_id         = ""
  client_id         = ""
  client_secret     = ""
}
3] Use Open ID Connect
If you’re using Github workflow for you’re pipeline then Open ID is the recommended approach.
provider "azurerm" {
  use_oidc = true
  features {}
}
Both three options have their own pros/cons. For testing purpose you can use the service principal method, but please expose the credentials using environment variable.
Step 4: Initialize Terraform and apply
Once the provider block is configured with the correct credentials, we can successfully execute the commands below
terraform init
terraform apply
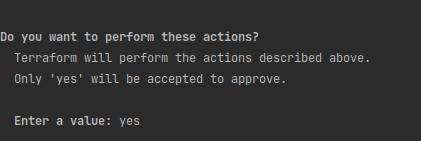
You will be prompted to approve the changes. If the changes seem to be correct, we need to type in “yes” and wait for the execution. Provisioning AKS cluster takes a fair amount of time.
Upon the creation of the cluster, there will be 9 resources created.
![]()
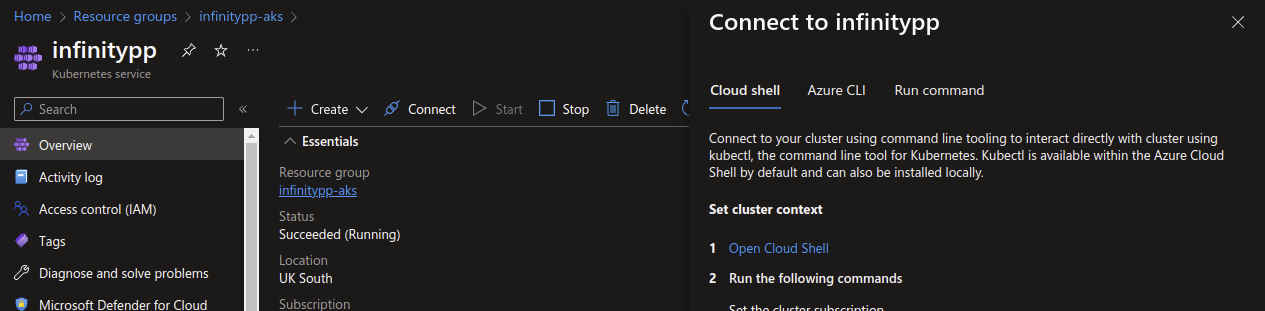
We have successfully provisioned our AKS cluster. We can confirm this by visiting the portal over our resource group.

Step 5: How to connect to the AKS cluster from local computer?
Connecting to the cluster using kubectl is important. Azure makes this easy by offering us the command in the portal.
On the Azure portal, if we click on the “Connect” button, it opens a sidebar with a step by step guide.
Summary
Creating resources through IaC is a best practices, while Azure offers Biceps or ARM templates majority of companies leverage Terraform for the infrastructure as code so this makes it the best option for a tool. Terraform registry plays an important role, for example without the module we would have written several lines of code but now we are using variables and the module handles the complexity. If you can find a module, go ahead and use it not only it saves time but you get the support of the community.
How to make an AKS cluster production bullet proof?
The cluster we created is great for a test workload but for a production workload the cluster needs more tweaking:
Some key points for a production cluster:
- Nodes should be spread across availability zones.
- Authentication should be integrated with AAD
- Do not use Service Principals
- Apply CIS Benchmark.
- Implement the guides on Baseline architecture for an Azure Kubernetes. I highly recommend this!
- Use Azure Key Vault to fetch secrets for applications.
- Have the similiar environment for your testing workloads. Keeping Staging and Production environment on the same architecture component helps you in detecting failures earlier.
- Look into ArgoCD or Flux to apply Gitops.
- Integrating monitoring tools such as Grafana. Grafana plays an important job by creating helpful dashboards to alerts.
- Have an action plan for upgrading your Kubernetes cluster. Test the upgrades on a non-production environment first!
- Try to use Azure services instead of a self managed ones. A key objective of running resources on the cloud is to use their services which comes with a SLA.
- Use a pipeline to create the resources, do not create the clusters from a local computer!
- Configure the cluster to be private if not restrict the access via IP addresses.
- Scan the container images.
- Train engineers on how to troubleshoot Kubernetes and up-skill them on basic K8 areas such as pods,deployments,ingress etc.
- Always stay up to date with the latest Microsoft releases.